
3. Interactive maps
Interactive maps are a recent addition to StoryScript, but it makes sense to discuss them third as you already have the basic knowledge on locations and destinations needed to work with them. Although probably not fit for an interactive story, you can use interactive maps in other game types as well as in educational tools. Whatever your goal, bringing a map to life by navigating it and learning about it in your browser is fun. Maps can be used to visualize your world and, optionally, navigate it by making it clickable.
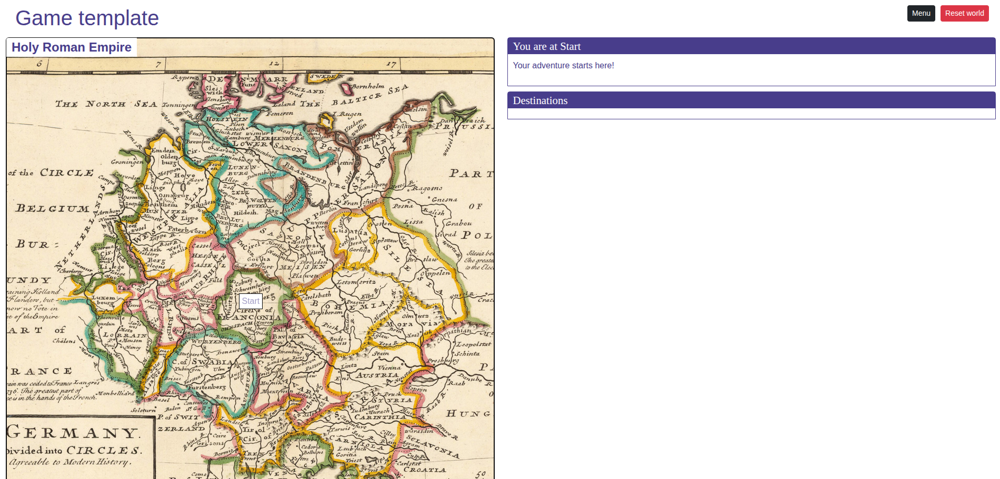
You can find an example of an interactive map in your Games/MyInteractiveMap folder, and start it by changing the gameName in your currentGameName.js file to MyInteractiveMap. You can also find the demo online. The demo uses a map of the Holy Roman Empire.
Let's create a new game for your own interactive map by first creating a new game (check the quickstart when you forgot how to do that). We need to customize the game's UI GameContainer component again, like we did in the first tutorial (for your convenience, copy the GameContainer.vue file from the 'src/UI/Components' to your game's 'ui/components' folder). Change the markup between the <template> tags to this:
<template>
  <div class="container-fluid body-content">
    <div class="row">
      <div class="col-6">
        <location-map></location-map>
      </div>
      <div id="location-container" class="col-6">
        <div v-if="game.state === 'Play'">
          <location-text></location-text>
          <exploration></exploration>
        </div>
      </div>
    </div>
  </div>
</template>
The location-map component will display our map. For this, we need to add the map picture to our game’s resources folder and create a new Map using the StoryScript Create Map command, which will add a map to your game’s maps folder:
npm run scm HolyRomanEmpireOpen the HolyRomanEmpire.ts file. Add the path to the map image for the mapImage property and use the Start location as the first location on the map. Also set the coordinates of the first location to be in the center of Franconia:
export function HolyRomanEmpire() {
	return LocationMap({
		name: 'HolyRomanEmpire',
		mapImage: 'holy-roman-empire.jpg',
		locationNamesAsTextMarkers: true,
		locations: [
			{
				location: Start,
				coords: '580,500'
			},
		],
	});
}NOTE: 'coordinates' here means image coordinates, not geographical coordinates! You can find these using an image editor like Paint.NET on Windows or GIMP on Linux. There are also web-based tools available like imageonline.io, but don't use these for sensitive or copyrighted materials!
With this, your browser should show the map of the empire. You’ll see the map center on the Start location when the browser loads.
Note that you can control the size of the map by specifying a maximum height for the map container in your game.css file, like this:
.map-container {
    max-height: 800px;
}
If you want to show a different text for the label, you can enter the alternative text on the map location:
locations: [
    {
        location: Start,
        textLabel: 'Franconia',
        coords: '580,500'
    }
]
Add two locations to the game for Westphalia and Austria, and add destinations to all of them so they are all connected. Add the new locations to your map:
locations: [
    {
        location: Start,
        textLabel: 'Franconia',
        coords: '580,500'
    },
    {
        location: Westphalia,
        coords: '430,330'
    },
    {
        location: Austria,
        coords: '820,720'
    }
]
When the browser reloads, you’ll see the three locations on your map. You can navigate between the imperial circles using the destination buttons at the moment. When you do so, the game will centre the map on the location you’re currently at. If we want to make the map more interactive, you can allow the player to navigate from one location to the next (you can only navigate between locations that have destinations connecting them) by clicking the location label. Enable this option in your map file like this:
mapImage: 'holy-roman-empire.jpg',
locationNamesAsTextMarkers: true,
clickable: true
The labels for the locations that can be reached will become active and clickable. Instead of text labels, you can also use a picture to show the location on the map. To do this, add an image to your game’s resources folder and add the file name to the map location, like this:
{
	location: Westphalia,
	coords: '430,330',
	markerImage: 'westphalia.png'
}
The image will show on the Westphalia location on the map.
There are three more options for maps to highlight. First, instead of showing text labels and images right away, you can also have the player enjoy the map without any clutter and only show the labels and images when a key is pressed. If you want to use the SPACE key for this, you can use this configuration:
locationNamesAsTextMarkers: true,
clickable: true,
showMarkersOnKeyPress: ' '
Now the map will show without any extras. Press space to bring up the labels and image. Releasing space will hide them again after a short interval.
Second, you can indicate the player position on the map using an avatar image, like this:
mapImage: 'holy-roman-empire.jpg',
avatarImage: 'avatar.png',
locationNamesAsTextMarkers: true
This will show an avatar that will move around the map when the player navigates between locations.
Finally, you can have a small map present at all times and show a larger version when the player wants to see it using the toggleFullScreen option:
clickable: true,
showMarkersOnKeyPress: ' ',
toggleFullScreen: true
This will show a ‘>’ sign after the map name that the player can click to bring up the full screen version. You can control the dimensions of the full screen map using the map-dialog class in your css. By default, it uses a height of 95%.